Apo 7.14 Tips:
Wow! I haven't done a new journal since I got fooled on April Fools day! So seeing as I have worked with dc_linear and dc_triangle a little, I thought I might share some fun.
dc_linear:
Xyrus-02's
Apophysis 7.14 allows for the use of direct color. I'm a mental midget on a lot of this stuff so while there are certainly explanations on or about direct color out there, they seem to be more to the technical side rather than the practical use. This is no criticism of those explanations, (such as
IDeviant's
blog at Apophysis on direct color), but rather a more hands on, non technical approach. Think of it like this: I know gas explodes, and if you put it in your gas tank, the car makes the gas explode in a controlled way such that it makes your car go! To most people, this is all you have to know. It's all I need to know. My point? You can use direct color without the technical understanding behind it. This is a good thing for all of us who are technically challenged, like me!
Disclaimer!!! I've said this time and time again, I make no claims as to being an expert with Apo. I simply have fun with it and have managed to use it without a need to understand anything more than the basics. So this is meant to be a simple basic guide on how I have been using dc_linear and dc_triangle and not necessarily a guide on how to use it properly or how it was intended to be used.
First off, you obviously need a working version of
Xyrus-02's
Apophysis 7X.14 installed and working. The exe creates a new apo folder called Apophysis 7x! Included in this version you will find dc_linear, dc_carpet, and dc_bubble among the other plugins. (the dc_ obviously means it is a direct color enabled plugin) I downloaded
Xyrus-02's
dc_triangle plugin separately. A word of caution here: You can add your own favorite plugins to the new plugin folder in the Apophysis 7X directory, but I as well as others have had a few problems. If you run Apo 7x and find that a lot of the randomly generated flames are not showing up in your editor and adjustment windows, then it appears to be a plugin issue. Try opening the options tab and deselecting all variations and then selecting just a few at a time for generating random flames. Onward!
Sample 1
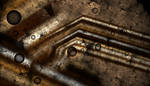
Having no idea on how to use dc_linear myself, I did what I believe any of us might do. I opened Apo 7.14, went in my options tab and deselected everything! I then selected a few variations, (plugins) to experiment with. For starters I chose dc_linear, linear, julian and splits. While in the options tab I also set the number of transforms, (triangles) to 4, and the number of flames to be generated to 25. I closed the options tab and hit control B to generate a new batch of flames. The first sample below is a simple example of what dc_linear did. I didn't tweak any of the variables for dc_linear in this one. Eventually, I deleted one of the transforms and added a final with spherical in it. The dc_linear is what created the colored bands. It used the same colors in the same order that are shown in your gradient. If your gradient has smoothed transition (blurred) between the colors, then no color edges between the colors will show. If edges do show between the colors, you can blur the gradient to help eliminate them, though it will obviously change the looks of the flame. I chose not to blur the gradient on this one and if you look closely you can see the transition of the colors...

Sample 2
This particular sample uses dc_linear, spherical (for the holes), linear and splits. The first image is with the default variable settings on the dc_linear. Once again on the first image you can see the gradient changes clearly. (If you take the time to view the full image!)

On the second image we have fixed that problem by blurring the gradient. For those who don't know how to do that, in your adjustment window, select the gradient tab. Just off to the right of the slider you will see where it says Rotate. Click that and then choose blur from the list that appears. Now you just have to blur the gradient (move the slider by clicking on the right side button) until the colors blend almost seamlessly. Depending on the gradient, it shouldn't take much. I think it only took 5 or 6 clicks for this one. Open both of these images in tabs in your browser and click between the two and you can more readily see the difference the blur makes... Don't confuse this with blurring with the a blur variation! We are not blurring the entire flame or individual xform, but rather we are only blurring the gradient to take the edges off the color changes...

Now let's see what some of the dc_linear variables do! This sample was generated randomly. I moved the transforms about a little, re sized them a little and just played with it in general. (I'll post parameters at the end!) Xform one has splits, xform 2 has linear and dc_ linear and xform 3 has linear, dc_linear and spherical. It also has a final xform as I was experimenting with some stuff but it only has linear in it now. It could be deleted and just spun around a bit with the rotate function. First image is with the default variables for dc_linear on xforms 2 and 3. The three variables to play with are offset, angle and scale. In the second image I have changed the default scale setting from 1 to .3 in both xforms 2 and 3. As you can see it increases the number of 'ripples' by making them smaller. Increasing the scale above 1 reduces the number of ripples by making them bigger. In the third image we have changed the angle of the dc_linear in xform 2 from the default of 0 to .5. This does exactly what you might think in that it spins the 'rippled' effect, in this case clock wise. A negative number will spin it counter clock wise. And finally in the fourth image, we have adjusted the offset of dc_linear on xform 2 from the default of 0 to .905. (Compare image 1 to image 4 and you can see the difference.) Offset basically slides the coloring effect of the 'ripples' across the influence of the xform you are adjusting in your flame.


And that's pretty much all I know! I think it's enough where you can play with it a little. You can try adding a little dc_linear in some of your old flames to see how it affects them too. I find that piggy backing dc_linear with other variations works well for me. I also experimented with dc_triangle but left the variation variables on default for the most part with that one. Following are some examples with dc_linear. dc_triangle and crop...


And here's the parameters of one of the examples!
<flame name="dc_linear_scraps3" version="Apophysis 7x Version 14" size="720 450" center="0.667828457301105 0.166079495640604" scale="198.3" oversample="1" filter="0.5" quality="50" background="0 0 0" brightness="8.73913043478261" gamma="4" estimator_radius="9" estimator_minimum="0" estimator_curve="0.4" enable_de="0">
<xform weight="0.25" color="0" splits="1" coefs="0 -0.674092 0.674092 0 1.055621 0.780576" splits_x="-0.119" splits_y="0" opacity="1" />
<xform weight="0.25" color="0.333333333333333" linear="0.290391133632511" dc_linear="0.709608866367489" coefs="-0.129792 0.690176 0.690176 0.129792 0.307489 0.681712" dc_linear_offset="0" dc_linear_angle="0" dc_linear_scale="0.3" opacity="1" />
<xform weight="0.25" color="1" linear="0.895785" spherical="0.005" dc_linear="0.061215" coefs="0.167102 -0.429792 0.429792 0.167102 0.106338 0.266782" dc_linear_offset="0" dc_linear_angle="0" dc_linear_scale="0.3" opacity="1" />
<finalxform color="0" symmetry="1" linear="1" coefs="1.240655 0.370248 -0.370248 1.240655 -0.487142 -0.768186" />
<palette count="256" format="RGB">
543C1D4932163E2A1135220D2B1B092114041A0E01160B00
130A001109001008000F07000F0600100700120700150800
170A00190A001C0B001D0C001F0D00200E00200E00210F01
21100322110523140826170C2A1D1233261C3D3228483E35
544C426059516E68607C776F88847C918E8697948C9A968E
9A968C989289938C828C847983796D776B5D6B5C4D5F4E3E
5342314B3928412E1D392513321E0B2E18052C16032D1703
301A05341D073A22093F260C462B0E4E32125638155C3D18
6241196543196845196A4618684417654317624117614018
62411A61411C61431F6245236649296C502F735634785B38
7C5E3B7F613D81643F8366418466428265417F623F7B5F3D
775D3B7359396E5537685134614B3159432B503C2548341F
412D1A3C2817352212301D0E2B1809281406261205261104
251003251003240F02230F01220E01220E01210D01210D01
210E022310042614082C1A0D3422123F2C1A4B382359452E
65523B756148847055948063A38F6FAE9A7BB7A485BEAB8E
C2B194C3B296C1AF92BBA98BB29E7FA791739983658B7356
7E65486F5537614728553A1C4A2F12452A0F42270D42260C
42270D44280E482C124E311755391E5D402563462B694C30
6D4F327053357054377053376E5135694C3063462A5C3F23
53371C4D3117462A1240240D3B1F09351A053218032E1602
2C14012913012712012711012712012814032C1806301D0A
37220E3E28134630195039215C462D685338735E447E684E
8670558F7A5F9783679E8B6FA39074A69174A89272AA916F
AA906AA88C66A58760A0805A99795392714B896842805F3C
7656346B4C2E614327573B2050361C4B3219492F18472E17
462D15482F164D3319543A1F5C412464482A6B4F31745839
7D6344876E4E9078599781639D896EA49178AA9981AF9E87
B2A28AB3A38BB3A28AB2A188B09E84AB987EA591759D886B
947E628B7558826C50796448715B416A543B664F35644D33
654E326850346E5538755B3B7D613E8468428B6D4690724A
94754B9475499272468C6D4186673E7C5F38705530634927
</palette>
</flame>
Have fun!
 (Smile)")